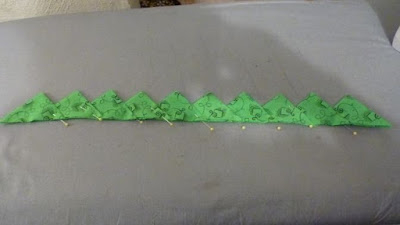
This is my first tutorial - someone on my on-line group wanted to know how I did my Continuous Prairie Points, so I decided to "have a go". I hope you can follow it.
This is a finished strip.
Using this method, the points are always evenly spaced and the same size. I like to work on lengths of about 20”, so you could use fat quarters but there would be more wastage.
My example is based on a 4” original square. You can make them any size, but I find on a quilt the 4” is quite large enough, and when I have made 5” it really doesn’t make much difference to the finished size of the Point but uses quite a lot more fabric. I use a 3” on cushions.

1. Cut an 8” wide strip the width of the fabric (selvege to selvege). The 8” is twice the basic square size. Trim off the selveges

2. With wrong sides together, fold the band in half lengthwise. Press well. You need to be able to see the centre fold line.

3. Open the fabric out and with the wrong side up, begin working from one end. On the top side of the pressed centre line, mark lines from the centre fold to the edge, starting 4” from the end.
4. On the bottom side of the centre line, your first mark will be half the square size (in this case 2”), and from then on every 4”, so that the lines either side of the centre fold are staggered.

5. Cut away the 2” marked piece (you cant make a point out of that!). Then cut all the marked lines, from outer edge to the centre fold line. Be careful not to cut past the fold. I like to do this with scissors, cos I cant judge properly where to stop with the rotary cutter. This is when I cut the length in half (along the centre fold, between 2 staggered cuts).

6. Working at the ironing board so that the folds can be pressed as you go, place the fabric wrong side up. Assuming you are right handed, you will be working from the right hand side to the left. Press the first square into a half square triangle, working away from the iron, so that the fold goes from the bottom right to the top left. Press all the squares along this side the same way.
7. Press the bottom squares, also away from the iron, so the fold goes from the top right (fold line) to the bottom outer edge.
8. Now for the Points! Take the top of the first triangle and fold it back down on itself (the top of the triangle comes back down to the beginning folded edge) to make another smaller triangle. It’s a Prairie Point, but it’s
joined at the fold!

9. Flip this small triangle down, so that when you fold the bottom triangle up, this first one is enclosed in the second triangle.

Pin to hold in place. Make sure the pin heads are on the straight edge.

10. Flip these 2 Points up and fold down the next triangle and pin to keep in place.
11. Keep flipping and folding back, then pinning, until you reach the end of the strip.
12. Press well but carefully (especially if your pins are plastic heads).
You might end up with lots of 20” strips of triangles, but believe me, if you have to move a 40” strip of loose cut squares it takes ages to straighten it out! 20” is much more user friendly.
How much fabric, you ask? Well, you measure the length of the sides and work out how many cuts of 40” (width of the fabric ) you need and cut that many 8” strips.
To join to your quilt. Trim the edges of your quilt, then pin the batting and backing out of the way. Join the Prairie Points to your quilt top, right sides and raw edges together, with a ¼” seam. You will find that you can ease or stretch the lengths to fit quite easily. But, if you find that it just isn’t working, cut 3 or 4 points individually and space them to fit right to the corner. There will not be a point on the corners. It just doesn’t work that way, even if you cut them individually.
Trim the batting an extra ¼”; hand sew the backing in place along the seam line at the back of the Points.
* * * *
And there you have it. My very first online tutorial. I often do quick workshops on this at retreats or craft days. Once you get the hang of it, it's quite easy.
Cheers,
Faye.
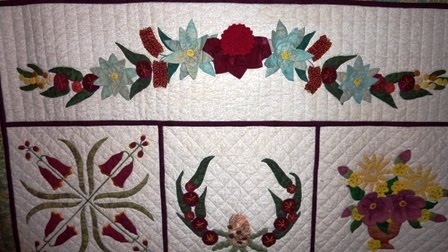
 Well. The weekend has come and gone and I didnt get as much finished as I'd hoped. I have put up another photo of the Byzantine Star quilt - a close up. Hopefully it's not so dark. I worked on this on Saturday night and got the last two rows put together, and one actually added to the quilt. So, now all (hmmm ... all?) I have to do is put on the last row, and then add the 1" black, finish making the 2.5" squares for the next border, and put on a 6" yellow border. Then it will be ready for my friend Terry to quilt it. It will be too big for my machine and I dont want to hand quilt it !!